Встановлення та налаштування пакета OPKG rTorrent
rTorrent — це клієнт BitTorrent на C++ для Linux, заснований на бібліотеках libTorrent. Легкий і невимогливий до системних ресурсів клієнт BitTorrent.
Розглянемо встановлення торрент-клієнта rTorrent з репозиторію Entware.
Спочатку потрібно підготувати зовнішній USB-накопичувач і встановити на нього систему пакетів з репозиторію Entware. Як це зробити, показано в статті Використання файлової системи EXT4 на USB-накопичувачах.
Встановіть пакет rtorrent-easy-install.
Виконайте команду
opkg install rtorrent-easy-install:/ #
opkg install rtorrent-easy-installInstalling rtorrent-easy-install (0.2-3a) to root... Downloading http://bin.entware.net/mipselsf-k3.4/rtorrent-easy-install_0.2-3a_mipsel-3.4.ipk Installing rutorrent-plugin-rpc (3.8-1) to root... Downloading http://bin.entware.net/mipselsf-k3.4/rutorrent-plugin-rpc_3.8-1_mipsel-3.4.ipk Installing rutorrent (3.8-1) to root... Downloading http://bin.entware.net/mipselsf-k3.4/rutorrent_3.8-1_mipsel-3.4.ipk Installing rtorrent-rpc (0.9.7-1) to root... Downloading http://bin.entware.net/mipselsf-k3.4/rtorrent-rpc_0.9.7-1_mipsel-3.4.ipk Installing libcurl (7.61.0-3) to root... Downloading http://bin.entware.net/mipselsf-k3.4/libcurl_7.61.0-3_mipsel-3.4.ipk Installing libopenssl (1.0.2p-1) to root... Downloading http://bin.entware.net/mipselsf-k3.4/libopenssl_1.0.2p-1_mipsel-3.4.ipk Installing zlib (1.2.11-2) to root... Downloading http://bin.entware.net/mipselsf-k3.4/zlib_1.2.11-2_mipsel-3.4.ipk Installing ca-bundle (20180409-3) to root... Downloading http://bin.entware.net/mipselsf-k3.4/ca-bundle_20180409-3_all.ipk Installing libtorrent (0.13.7) to root... Downloading http://bin.entware.net/mipselsf-k3.4/libtorrent_0.13.7_mipsel-3.4.ipk Installing libsigcxx (2.5.4-1) to root... Downloading http://bin.entware.net/mipselsf-k3.4/libsigcxx_2.5.4-1_mipsel-3.4.ipk Installing libncursesw (6.1-1) to root... Downloading http://bin.entware.net/mipselsf-k3.4/libncursesw_6.1-1_mipsel-3.4.ipk Installing xmlrpc-c-server (1.39.13-2) to root... Downloading http://bin.entware.net/mipselsf-k3.4/xmlrpc-c-server_1.39.13-2_mipsel-3.4.ipk Installing xmlrpc-c (1.39.13-2) to root... Downloading http://bin.entware.net/mipselsf-k3.4/xmlrpc-c_1.39.13-2_mipsel-3.4.ipk Installing xmlrpc-c-internal (1.39.13-2) to root... Downloading http://bin.entware.net/mipselsf-k3.4/xmlrpc-c-internal_1.39.13-2_mipsel-3.4.ipk Installing xmlrpc-c-common (1.39.13-2) to root... Downloading http://bin.entware.net/mipselsf-k3.4/xmlrpc-c-common_1.39.13-2_mipsel-3.4.ipk Installing coreutils-stat (8.23-3) to root... Downloading http://bin.entware.net/mipselsf-k3.4/coreutils-stat_8.23-3_mipsel-3.4.ipk Installing coreutils (8.23-3) to root... Downloading http://bin.entware.net/mipselsf-k3.4/coreutils_8.23-3_mipsel-3.4.ipk Installing coreutils-id (8.23-3) to root... Downloading http://bin.entware.net/mipselsf-k3.4/coreutils-id_8.23-3_mipsel-3.4.ipk Installing gzip (1.9-1) to root... Downloading http://bin.entware.net/mipselsf-k3.4/gzip_1.9-1_mipsel-3.4.ipk Installing curl (7.61.0-3) to root... Downloading http://bin.entware.net/mipselsf-k3.4/curl_7.61.0-3_mipsel-3.4.ipk Installing screen (4.6.2-1) to root... Downloading http://bin.entware.net/mipselsf-k3.4/screen_4.6.2-1_mipsel-3.4.ipk Installing libncurses (6.1-1) to root... Downloading http://bin.entware.net/mipselsf-k3.4/libncurses_6.1-1_mipsel-3.4.ipk Installing php7-cgi (7.2.9-1) to root... Downloading http://bin.entware.net/mipselsf-k3.4/php7-cgi_7.2.9-1_mipsel-3.4.ipk Installing php7 (7.2.9-1) to root... Downloading http://bin.entware.net/mipselsf-k3.4/php7_7.2.9-1_mipsel-3.4.ipk Installing libxml2 (2.9.8-3) to root... Downloading http://bin.entware.net/mipselsf-k3.4/libxml2_2.9.8-3_mipsel-3.4.ipk Installing lighttpd-mod-fastcgi (1.4.49-2) to root... Downloading http://bin.entware.net/mipselsf-k3.4/lighttpd-mod-fastcgi_1.4.49-2_mipsel-3.4.ipk Installing lighttpd (1.4.49-2) to root... Downloading http://bin.entware.net/mipselsf-k3.4/lighttpd_1.4.49-2_mipsel-3.4.ipk Installing lighttpd-mod-scgi (1.4.49-2) to root... Downloading http://bin.entware.net/mipselsf-k3.4/lighttpd-mod-scgi_1.4.49-2_mipsel-3.4.ipk Installing lighttpd-mod-auth (1.4.49-2) to root... Downloading http://bin.entware.net/mipselsf-k3.4/lighttpd-mod-auth_1.4.49-2_mipsel-3.4.ipk Installing lighttpd-mod-authn_file (1.4.49-2) to root... Downloading http://bin.entware.net/mipselsf-k3.4/lighttpd-mod-authn_file_1.4.49-2_mipsel-3.4.ipk Configuring zlib. Configuring libopenssl. Configuring ca-bundle. Configuring libcurl. Configuring lighttpd. Configuring lighttpd-mod-authn_file. Configuring xmlrpc-c-common. Configuring xmlrpc-c-internal. Configuring xmlrpc-c. Configuring libxml2. Configuring php7. Configuring php7-cgi. Configuring coreutils. Configuring coreutils-stat. Configuring libsigcxx. Configuring libtorrent. Configuring libncursesw. Configuring xmlrpc-c-server. Configuring rtorrent-rpc. Configuring coreutils-id. Configuring gzip. Configuring curl. Configuring rutorrent. Configuring rutorrent-plugin-rpc. Configuring libncurses. Configuring screen. Configuring lighttpd-mod-fastcgi. Configuring lighttpd-mod-scgi. Configuring lighttpd-mod-auth. Configuring rtorrent-easy-install.Коли ви встановите пакет, вам одразу буде запропоновано налаштувати основні функції.
Ви можете встановити логін/пароль, порт, швидкість завантаження/вивантаження, шлях для завантажених торрент-файлів:
Введіть "ім'я користувача:пароль", якщо ви хочете захистити вебінтерфейс, або натисніть Enter, щоб залишити захист паролем вимкненим []: встановіть своє ім'я користувача:пароль, напр. myhome:mytorrent
Який порт слід використовувати для вебінтерфейсу? [81]: порт за замовчуванням 81, ви можете встановити будь-який вільний порт.
Введіть (максимальну) швидкість завантаження в КБ/с [2048]: швидкість за замовчуванням 2048, ви можете встановити власне значення.
Введіть (максимальну) швидкість вивантаження в КБ/с [2048]: швидкість за замовчуванням 2048, ви можете встановити власне значення.
Введіть назву папки на USB-накопичувачі, де має зберігатися торрент-контент [/opt/torrents]: вкажіть шлях, куди будуть завантажуватися торрент-файли. Краще встановити розділ NTFS, наприклад, ми створили розділ з файловою системою NTFS під назвою
FILES, в ньому ми створили каталогdownload, вкажіть шлях:/tmp/mnt/FILES/download#### Welcome to rtorrent easy installation script! We assuming no lighttpd/rtorrent/rutorrent was installed before! Please, answer a few question to configure torrent client. Default aswers given in [brackets], just hit Enter to accept it. Type "username:password" if you want to protect Web UI or hit Enter to leave password protection disabled []: test:test Which port should be used by web interface? [81]: Enter (maximal) download speed in KB/s [2048]: Enter (maximal) upload speed in KB/s [2048]: Enter folder name on USB drive where torrent content should be stored [/opt/torrents]: Done! You may open 51411-51412 TCP/UDP ports on your router to facilitate uploading/donwloading. It's not necessary but recommended. rutorrent web UI will be available at following URL: http://<ip_address_of_router>:<port>/rutorrent Do you wish to start torrent client? [y]: Starting lighttpd... done. Starting rtorrent... done.
Якщо демону rtorrent не вдасться запуститися, ви побачите помилку:
Do you wish to start torrent client? [y]:
 Starting lighttpd... done.
 Starting rtorrent... failed.
Collected errors:
 * pkg_run_script: package "rtorrent-easy-install" postinst script returned status 255.
 * opkg_configure: rtorrent-easy-install.postinst returned 255.
Буде необхідно внести зміни в конфігурацію rtorrent. Для цього потрібно встановити пакет nano і відредагувати файл конфігурації rtorrent.conf.
Встановіть пакет nano:
/ #
opkg install nanoInstalling nano (2.9.8-1) to root... Downloading http://bin.entware.net/mipselsf-k3.4/nano_2.9.8-1_mipsel-3.4.ipk Configuring nano.Відредагуйте файл конфігурації rtorrent.conf, де ми видалимо стару конфігурацію:
/ # nano /opt/etc/rtorrent/rtorrent.conf
Виділіть усі рядки старої конфігурації, натисніть
Alt + A:max_uploads = 8 session = /opt/etc/rtorrent/session schedule = watch_directory,5,5,load_start=/opt/etc/rtorrent/watchdir/*.torrent schedule = untied_directory,5,5,stop_untied= schedule = low_diskspace,5,60,close_low_diskspace=100M bind = 0.0.0.0 port_range = 51411-51411 check_hash = yes #use_udp_trackers = yes encryption = allow_incoming,enable_retry,prefer_plaintext dht = auto dht_port = 51412 peer_exchange = yes scgi_local = /opt/var/rpc.socket encoding_list = UTF-8 max_uploads_global = 32 max_downloads_global = 64 download_rate = 2048 upload_rate = 2048 directory = /opt/torrents
Видаліть усі рядки старої конфігурації, натисніть
Ctrl + K.Додайте рядки нової конфігурації, натисніть
Ctrl + V:throttle.max_uploads.set = 8 session.path.set = /opt/etc/rtorrent/session schedule2 = watch_directory,5,5,load_start=/opt/etc/rtorrent/watchdir/*.torrent schedule2 = untied_directory,5,5,stop_untied= schedule2 = low_diskspace,5,60,close_low_diskspace=100M network.bind_address.set = 0.0.0.0 network.port_range.set = 51411-51411 pieces.hash.on_completion.set = yes trackers.use_udp.set = yes protocol.encryption.set = allow_incoming,enable_retry,prefer_plaintext dht.mode.set = auto dht.port.set = 51412 protocol.pex.set = yes network.scgi.open_local = /opt/var/rpc.socket encoding.add = UTF-8 throttle.max_uploads.global.set = 32 throttle.max_downloads.global.set = 64 throttle.global_down.max_rate.set_kb = 0 throttle.global_up.max_rate.set_kb = 0 directory.default.set = /opt/torrents
Натисніть
Ctrl + O, збережіть конфігурацію.Щоб вийти з редактора nano, натисніть
Ctrl + X.Запустіть rtorrent:
/ #
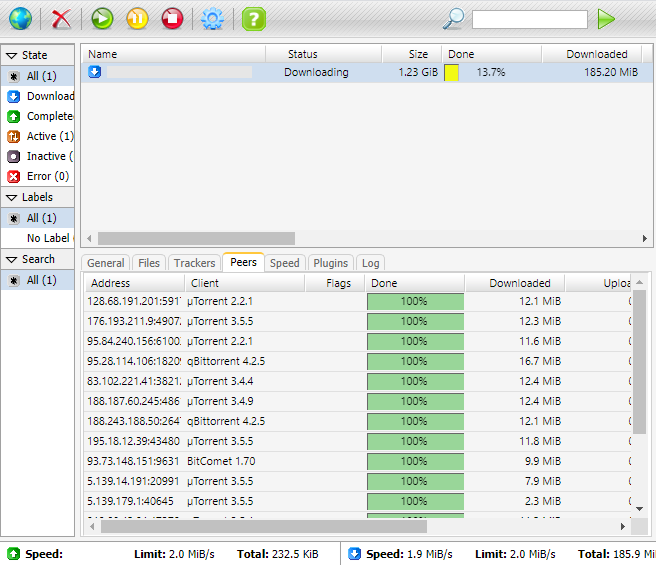
/opt/etc/init.d/S85rtorrent startStarting rtorrent... done.Перейдіть до вебінтерфейсу rTorrent за адресою
http://192.168.1.1:81/rutorrent/, налаштуйте та перевірте, як він працює: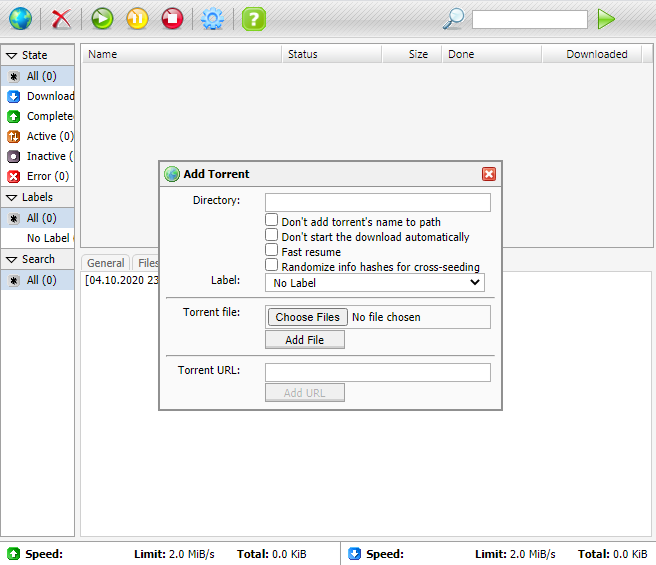
Важливо
Підтримка пакета надається в темі форуму розробників — .